Archive for the ‘Windows’ Category
April 19, 2017
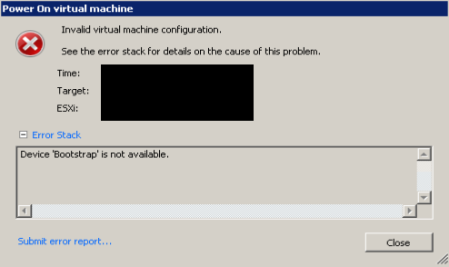
Virtual machine not powering on; with error output:
Device ‘Bootstrap’ is not available.
You will have to recreate the vmx file for the machine to run. Take the following steps:
- Note the specifications of the misconfigured VM (Processor, RAM, etc)
- Right click on VM; Click “Remove from Inventory”.
- Create new customized VM with the same specifications as the base machine.
- Attach the hardisks attached with the previous machine (VMDK’s)
- Once the VM is created and configured; power it on.
- If everything went according to the steps; the VM will turn on without any problems.
Posted in Uncategorized, vCenter, Virtualization, VMware, Windows Server 2008 R2, Windows Server 2012 | 4 Comments »
October 3, 2013

That amazing moment amazing amazing moment when you are able to resolve a long pending issue even that the TechNet forum was all baboons about it.
Having issues with management of your once applied quotas via File Server Resource Manager (FSRM) on your WIndows Server 2008 R2 SP2. Apparently the following can be the reasons for this error:
- You have installed the FSRM role; created quotas; un-installed the FSRM role and re-installed it.
- You have installed the FSRM as a Windows Feature instead of a Role.
And you will be apparently having these following errors/warnings in your Event Viewer:
- Warning 12317: File Server Resource Manager failed to enumerate share paths or DFS paths. Mappings from local file paths to share and DFS paths may be incomplete or temporarily unavailable. FSRM will retry the operation at a later time.
- Error: DfsMapCacheAdd(Domain), 0x8007054b, The specified domain either does not exist or could not be contacted.
- Error 8197: File Server Resource Manager Service error: Unexpected error.
- Error: CGlobalStoreManager::Install(), 0x80070005, Access is denied.
Now when you access the Quota tab from the FSRM MMC; you get the an error and no quotas are visible. Or you apply a quota on a folder but instead you get an error saying that the quota for the folder already exists but you don’t see any.
This is apparently due to the fact that the system files associated with the FSRM either get corrupted or the SYSTEM account access is restricted to these files or the previously installed FSRM role settings are still not completely removed.
Now the work around to this issue depends upon how bad have you played with your FSRM role. Just to let you know that This workaround will remove all your previously implemented quota rules and templates.
The work around to this is basically deleting the system files related to the FSRM. Before doing that; uninstall the FSRM Role or the FSRM Feature you installed previously.
Now to delete the FSRM related system files; you won’t be able to access them with you Admin credentials (even Enterprise Admin is not able to alter these files). Only the SYSTEM account has access to it.
Now to access these files here is a small tool; rather set of tools I used. Download the PSTools and follow the following steps.
- Unzip the downloaded PSTools.
- Run Command Prompt as Administrator.
- Navigate to the folder where you unzipped the PSTools.
- Execute the following command
PSEXEC -i -s -d CMD
Click YES if you have executed the command for the first time. A new Command Prompt window will be opened which basically is running under the privileges of the SYSTEM Account.
Now what you need to do is first delete a couple of files from inside the partition on which you have applied quotas before. If you have quotas applied on multiple partitions then you will need to repeat the following steps for all the partitions.
What you will basically do is delete the files quota.xml and quota.md from the %SystemVolumeInformation\SRM folder. These two system files will be write-protected hence you will need to alter the rights before deleting them.
In the newly opened Command Prompt window; execute the following commands but do not close the windows yet after these commands.
cd \System Volume Information\SRM
attrib quota.xml -s -h
attrib quota.md -s -h
del quota.xml
del quota.md
Along these files you will also need to delete the files ReportSettings.xml and SrmGlobalSettings.xml inside the root drive (i.e. C:\) %SystemVolumeInformation\SRM\Settings folder. In the same Command Prompt window opened earlier; execute the following commands.
cd \System Volume Information\SRM
attrib ReportSettings.xml -s -h
attrib SrmGlobalSettings.xml -s -h
del ReportSettings.xml
del SrmGlobalSettings.xml
After deleting these system files; install the FSRM Role again; this time hopefully you will be able to install the FSRM Role without any errors. If not then feel free to leave a message! Cheerio!!
References:
Tags:0x80070005, 0x8007054, 0x8007054b, Access is denied., DfsMapCacheAdd(Domain), Error 8197, Error: CGlobalStoreManager::Install(), File Server Resource Manager, File Server Resource Manager Service error: Unexpected error., FSRM, FSRM Error, Quota Error, quota.md, quota.xml, ReportSettings.xml, SRM, SrmGlobalSettings.xml, SYSTEM Account, SystemVolumeInformation\SRM, Warning 12317, Windows SYSTEM Account
Posted in ADMIN$, ICT, Pakistan, Trends & Tech, Uncategorized, Windows, Windows Server 2008 R2 | 3 Comments »
June 12, 2013

Just attended a conference; Microsoft’s Private Cloud which was an extension in regards to the TechEd 2013 event; the Microsoft’s Premiere Event for IT Professionals & Enterprise Developers held from 3- 6 June 2013 at LA USA based on the new developments in Microsoft’s Private Cloud. So whats new? Well these are the new developments.
– R2 releases for Windows Server 2012 and System Center 2012 instead of going towards service packs.
– Azure comming to SQL as SQL Azure.
– SQL Server 2014 release.
– Concept of Hybrid Cloud was much emphasized. Utilization of services from a private cloud plus reservations in the Public Cloud as well. But then why would I let my datacenter invest in a 2-tier solution; didn’t understood that.
– Windows Intune now avaliable for Pakistan region.
– Full focus in integrating other virtualization platforms rather than sticking to Microsoft centric approach.
– Windows 8.1 release.
Tags:ashfaq ahmad, ashfaq ahmad shinwary, azure, Cloud, hybrid cloud, Islamabad, Microsoft, Pakistan, Private, Private Cloud, Public Cloud, sccm 2012 r2, sql 2014, TechEd 2013, windows 8.1, windows server 2012 r2
Posted in ICT, Pakistan, SCCM 2012, Trends & Tech, Virtualization, Windows, Windows 8, Windows Server | Leave a Comment »
May 30, 2013
My woes with the P2V conversions is growing ever since I posted last time! Just an update on couple of things I learned in doing so. First would like to mention an error while specifying source computer to Standalone Converter; it would return the following error.
Unable to complete installation/uninstallation of vCenter Converter agent on ‘X.X.X.X’
As I stated in my last post that I read somehwere in the Standalone Converter help/troublshoot giude to disable files shares in order to access the source hardware information. I disabled my file shares last time for a server which I had to revert then as doing so didn’t solved my problem. But eventually I found out that in Windows Server; ADMIN$ (which points to C:\Windows) cannot be added from Computer Management once deleted. Hence to add that again; do the following steps:
- Run CMD Prompt as administrator.
- Run the command > net share ADMIN$ /UNLIMITED
This will enable your ADMIN$ share which will be used by the Standalone Converter to push its agent. Another error I figured out with one of my servers was
The source computer has GPT disk(s). Conversion of live computers with GPT disks is not supported. Conversion of virtual machines with GPT disk is supported only if disk-based cloning is performed.
This was due to the fact that the Standalone Converter is unable to read partitions with GUID tables! Hence it fails the whole process which is just insane on the part of VMware. At least it must give an option to skip that very partition and thus not failing the complete process. To resolve this you will need to disable the partitions. Following these steps:
- Run CMD Prompt as administrator.
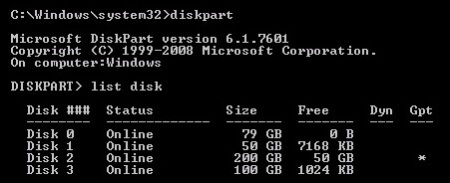
- Run the command > DISKPART
- Type > list disk
- This will give you a list of the partition configured with GPT (indicated by *).
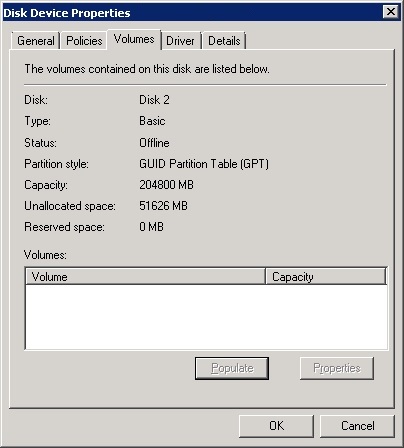
- Now goto Server Management > Disk Management and make the specific partition OFFLINE (Do note its capicity).
- Once the partition is OFFLINE; go to Device Manager > Disk Drives
- Verify the partition which you just turned OFFLINE by right clicking on the Disk Device > Properties > Volumes > Populate. You can verify it from the Capacity parameter. Click OK.

- Now right click on this Disk Device and click DISABLE.
After doing this again run the P2V conversion process; it will work like a charm! Hopefully 🙂 !!!
Tags:ADMIN$, disk list, diskpart, error, GPT, GUID, issues, MBR, The source computer has GPT disk(s). Conversion of live computers with GPT disks is not supported. Conversion of virtual machines with GPT disk is supported only if disk-based cloning is performed., Unable to complete installation/uninstallation of vCenter Converter agent on, vmware standalone converter
Posted in ICT, Trends & Tech, Uncategorized, Virtualization, VMware, Windows, Windows Server, Windows Server 2008 R2 | 1 Comment »
May 21, 2013

Once you are done with installation of VMware vCenter 5.1; you will notice that vSphere 5.1 client wont let you login into your vCenter Server. Either you will need to configure a local admin ID on your vCenter Server or if you have an active directory (AD) running in your environment; you will need to link that to your vCenter Server i.e. by configuring an identity source.
During installation of vCenter Single Sign On 5.1; it tries to add the identity source but in my case resulted in error (Error 29155.Identity source discovery error). I then found out its the case with other users as well and also was pointed out in VMware in their KB articles. The workaround for the issue given was to add the identity source manually. Doing so I got the following errors.
[LDAP: error code 8 – 00002028: LdapErr: DSID-0C0901FC, comment: The server requires binds to turn on integrity checking if SSL\TLS are not already active on the connection, data 0, v1db1]
and
simple bind failed:yourdomain:636
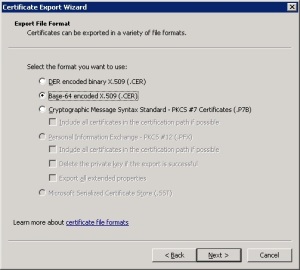
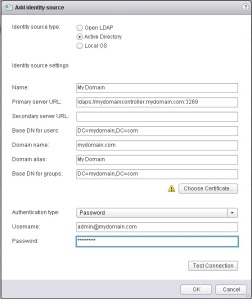
These errors are due to the fact that your AD is configured to communicate over LDAPS SSL connection. Hence to register your identity source; you will need the X.509 certificate of your AD domain controller (DC). For that export the certificate of your AD but make sure its the Base-64 X509 Certificate.
Once imported; again add the identity source as demonstrated below.
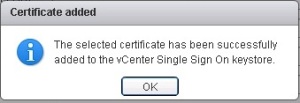
Once you chose the certificate from Choose Certificate tab; make sure you get the following confirmation. If not there must be something wrong with your certificate.
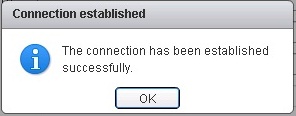
You can click on Test Connection to verify your AD connectivity.
If you are still facing problems in adding the identity source; make sure of he following things:
- Your vCenter, vSphere, vSphere Web Client, vCenter SSO etc must all be installed in the same default directories.
- Do add the port 3269 with your FQDN.
- There must a proper forward and reverse pointer entry on your DNS for your vCenter Server.
- Enter the complete user name for authentication e.g. user@domain.com
- If your domain controller is behind a firewall; make sure you have configured a policy to allow vCenter traffic.
Tags:active directory, AD, AD LDAP, Base-64 X509 Certificate, certificate for vcenter, error 29155, identity source, Identity source discovery error, identity source error, LDAP identity source, LDAP: error code 8 - 00002028, LDAPS, LDAPS identity source, LDAPS SSL, Microsoft, Pakistan, simple bind failed, single sign on, SSO, vCenter, vCenter 5.1, vcenter single sign on 5.1, vcenter sso 5.1, Virtualization, VMware, Windows, windows server 2008 R2, X509, X509 Certificate
Posted in ICT, Pakistan, Trends & Tech, vCenter, Virtualization, VMware, Windows, Windows Server | 6 Comments »
December 17, 2012
While I am still in the process of tweaking my Windows 8 workstation; apparently Microsoft has decided to block websites that have SSL certificates with keys that are less than 1024 bits.
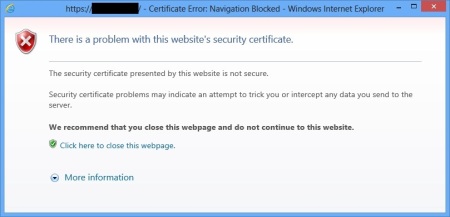
Evidently this not only an issue with Windows 8 (which I presumed) but rather a development with IE 8 and beyond. For the Windows 7; Microsoft did released a patch. While in Windows 8 (thanks to the forums) I did the following work around to get the sites load in the default IE10 provided with Windows 8.
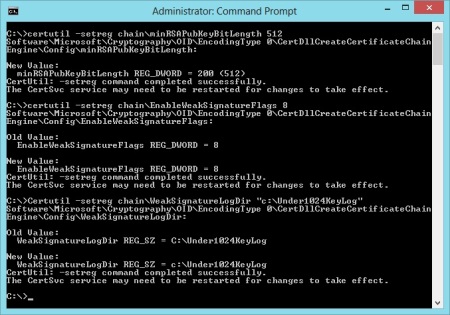
- Run command prompt with administrator privileges.
- Execute the following commands
certutil -setreg chain\minRSAPubKeyBitLength 512
– This will set the minimum allowed key length to 512 bits rather than 1024 bits.
certutil -setreg chain\EnableWeakSignatureFlags 8
– This flag will not enforce blocking of keys with length less than 1024 bits.
certutil -setreg chain\WeakSignatureLogDir “c:\Under1024KeyLog”
– This is required when you set the flag described in the previous command to 8. All the keys with length less than 1024 bits will be written to this folder. (Though I have to admit I haven’t found this folder physically :\)
- After giving my Windows a restart; things started working for me!
Microsoft Knowledge Bases: 2661254, 813444 .
Tags:HTTPS error loading, HTTPS WINDOWS 8, IE10 HTTPS, IE8 HTTPS, key length, minimum certificate key length, secured Web sites in Internet Explorer, security warning
Posted in Windows, Windows 7, Windows 8 | Leave a Comment »
December 16, 2012

I remember that installing the Remote Server Administration Tools (RSAT) on Windows 7 was installing a simple patch. But doing the same for my Windows 8; nothing happened! There were no tools available; no DSA.MSC, no DHCPMGMT.MSC. And I was getting fed up of taking RDP’s of the servers.
After googling around I did found the solution. The problem was with my language pack. I dont know why Windows 8 media are only released with English-Great Britain pack while the generic tools are dependent on the English-United Stated language pack. So here is how I came around those problems.
1. Download the language pack for Windows 8. You can download it from MSDN but that not free. So get yourself a subscription or find any other way 😉
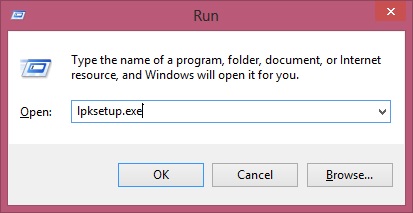
2. Once downloaded; Open the RUN prompt and type lpksetup.exe
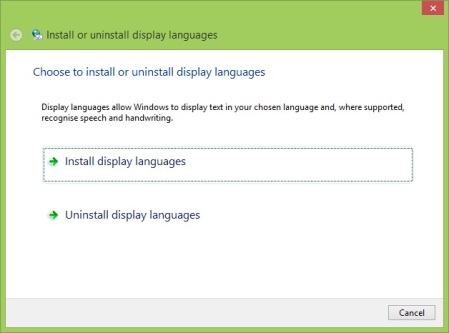
3. Click Install display languages.
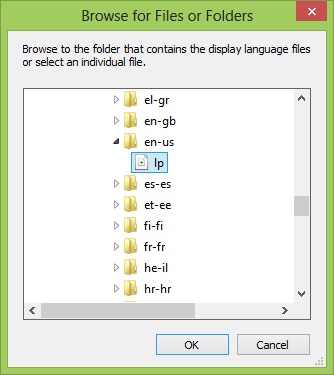
4. Browse to your language pack media and select the EN-US LP (language pack) and click OK. Click Install then.
5. Once done; download the RSAT for Windows 8 from their download center; yes this is free :p
6. Extract the .MSU using WinRar or any other tool you prefer. You will need the .CAB file which will appear after you extract the .MSU contents.
7. Open the Windows Power Shell with administrator privileges.
8. Execute the following command.
Add-WindowsPackage -PackagePath 'C:\Windows6.2-KB2693643-x84.cab' -Online -LogPath RSAT.log
I placed the .CAB file on my C Root for easy access. Just use the TAB key and find your way to it. In my case I had a 32-Bit OS. Once done you will have a nice set of icons like these in your start menu.

Hopefully this time you will get your RSA tools 😉 Not more RDP’s for me!
Thanks to IT Pro Powershell for a reference blog on this issue 🙂
Tags:Remote Server Administration Tools for Windows 8, RSAT, RSAT Error, RSAT from Windows Power Shell, RSAT Windows 8
Posted in Windows, Windows 8, Windows Power Shell | 21 Comments »
December 16, 2012
 After migrating to Windows 8; Some of my old applications were not able to execute due to non-availability of Dot Net Framework 3.5. Dot Net Framework 4.0 is provided with Windows 8 but downloading the standalone installer version of 3.5 was not possible (Even the standalone version tries to connect to the Internet; And in many cases that failed too which I came to know of some blogs online.)
But did you knew that Framework 3.5 can be directly installed on Windows 8 provided you have the DVD\ISO of Windows 8. If you have that then its just a command from the power shell and you are done. Here is it how it can be done.
1. Mount the Windows 8 DVD\ISO.
2. Open the Windows Power Shell with Administrator privileges.
3. Execute the following command (You DVD Driver letter as X):
Enable-WindowsOptionalFeature -Online -FeatureName 'NetFx3' -Source 'X:\sources\sxs'
And voila; you are done.
Tags:Dot Net Framework 3.5 Error, Installation of Dot Net Framework 3.5 standalone, Windows Power Shell
Posted in Windows, Windows 8, Windows Power Shell | 1 Comment »
October 4, 2012
Am feeling all CSI at the moment! Yesterday; I got involved in an investigation of a USB mass storage device theft. The clue I had at start was the Windows 7 machine from which the device was stolen and a CCTV camera. The video from the CCTV wasn’t much helpful without any supporting evidence from the machine hence my only resort was to dig deep into the machine’s OS and get to some conclusion.
I did what anyone would have done; checking out the event viewer. Unfortunately no such logs about USB devices are recorded there. So I resorted to some Googling. Once again I owe one to the immense help available out there online on forums and blogs; you can just find any solution these days! What I did found was that a USB device when plugged into a machine; leaves all kind of traces. These traces includes time stamps, vendor & product ID’s, serial numbers, product make\model etc. Of all these what more internal to forensics is the time stamps! and getting them accurate is the key to get some productivity out of the homework.
I found two really great utilities that helped me in ending the case. USBDeview by Nirsoft and Windows USB Storage Parser by TZWorks LLC. Of these two USBDeview is simple and more efficient and I will tell you here why.
So getting to homework! First get to know your machines and devices well.
Get to know which USB devices are used on a machine
You can get to know by going into the Registry Editor and checking out HKEY_LOCAL_MACHINE\SYSTEM\ControlSet001\Enum\USBSTOR. This is what you will get.

As from the snap shot you can see; there are a total of three devices used on this machine with the serial numbers mentioned under the product names. Serial numbers are unique and will give you a head start.
USBDeview
So now I know the device, and mapped the serial number as well. I then used a simple utility USBDeview to get the information I required. The great thing this utility is that It also shows you the details\time stamps etc from the previous dates.

This very efficiently shows the complete details in nicely sorted columns. The important entry that helped me a lot here is the Last Plus\Unplug time stamp.
Windows USB Storage Parser
This is another great command line tool. This tool will tell you about the different USB devices used on a machine, their vendor\product ID’s along with serial numbers and time stamps. But most important of all this will also tell you the “account name” that mounted the USB device which can really help in forensics.


As you can see in the snap shot above, its pretty well self explanatory. What missing from there is the unmounts event time stamp. That why I mentioned earlier in this blog that the USBDeview holds its ground pretty well and gives us a combined plus\unplug time stamp. This is what helped me in nailing the case.
So to complete the investigating, and to further cement my findings; I used these tools on the suspect’s machine as well and bingo!!! It was all filled up with familiar traces! I rested my case 🙂 !!!
Tags:Event Logs, Event Viewer, How to check USB logs in windows, How to find a stolen USB, How to find USB serial number from windows, Mass Storage, Microsoft, USB, USB Logs, USBDeview, Windows, Windows 8, Windows USB Storage Parser
Posted in Forensics, Trends & Tech, Windows, Windows 7, Windows 8, Windows XP | 2 Comments »